
Building the Rans S-21, Episode 2, The Vertical Stab - Pt. 2
Last time, we had just finished drilling the first side of the side skin / Fwd spar joint on one side, leaving roughly one side to go.
9/12/26 - 9/13/26 - I flipped the assembly over so that I could once again level and drill the second side. As mentioned last time, but with better photos this time, I was concerned about the way the L/E skin fit prior to drilling. With very few clecos holding it on, the skin was nothing even remotely close to flat, nor was there anything to hold it so.

Using a bunch of shot bags and other assorted weights, it gets a little better.

Also as mentioned last time, when drilling I start in the middle of the assembly and work toward the ends, one hole at a time. I hold the skin down with my fingers, drill the hole, cleco and move to the next hole, lather, rinse, repeat. Once finished it sits down quite well.
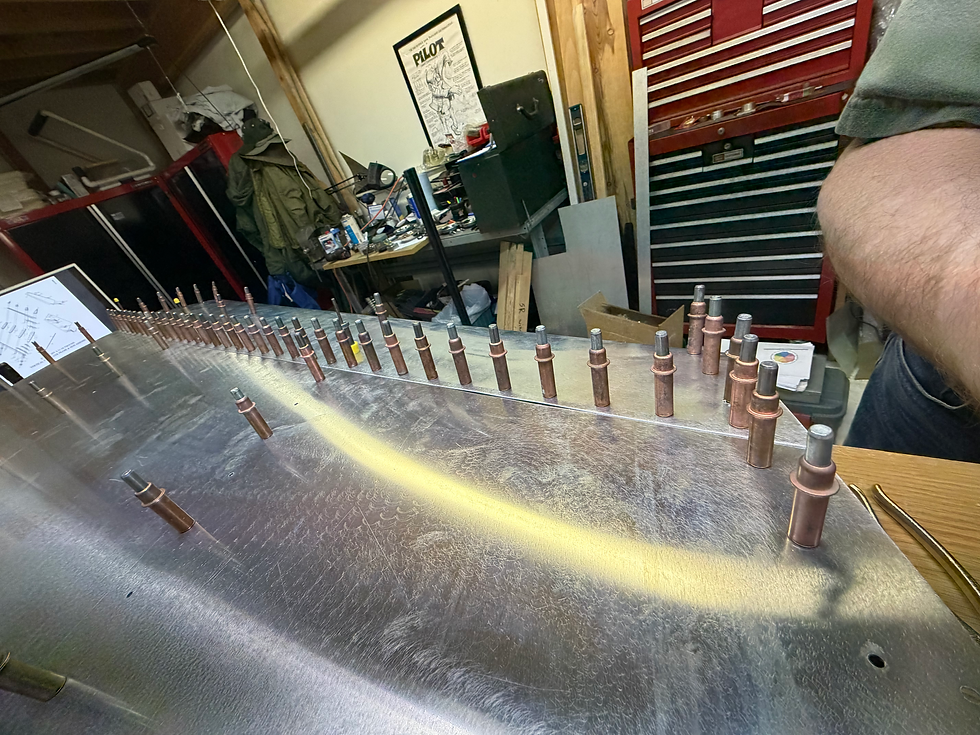
When finished, I was a bit concerned that there was still a bit of a gap in a couple of places, even with clecos installed. It turned out to be as I suspected, there were some metal chips that had worked their way under the skin. Once they were cleaned out, it sat right down like I expected it too,
While I was at this stage, I took the stab tip down and looked to see how it would fit. I think it will fit fairly well. Instead of the plastic fairing that comes with the kit, I am using the Aerosport Products Fairing. One reason for that is that I want to use the Aerosport Tail Light Adapter. I want to use that since I am planning to install an Aeroleds Suntail EXP tail position light / strobe. Carl has one on his RV-8 and it is very visible and makes him much easier to see than other aircraft and I want to have that kind of visibility. Though I haven't decided yet, there is a good chance that I will use the Aeroleds Pulsar 650 EXP Nav / Strobes on the wings.
Once all that was finished, it was time to take the whole thing apart to get it ready to put back together for the final time (hopefully).
9/19/26 - 9/20/26 - With the fun part over for the time being, it is time to go back into drudge mode. This consists mostly of deburring holes, smoothing edges, and getting ready for ProtectaClear application.
The previous installment showed pictures of holes that were punched and the need to deburr them. Drilled holes end up a little different. There are sometimes chips left attached that have to be eliminated. Fortunately, with aluminum they will usually wipe off by hand (don't try that with stainless, you'll regret it), but there is still a bit left that needs a deburring tool.

Shown above is the Fwd spar for the VS. This was made after drilling through the side skin first. When there is material backing up the hole, say a block of wood, or in this case, another piece of aluminum, the exit wound is decidedly reduced. In this case, being inside a closed structure, there was no way to back up the hole.
Fortunately, in aluminum those clean up fairly easily. Steel is another story, particularly stainless, but more on that much later.
Since the doublers and triplers, etc. were already deburred and smoothed prior to drilling we can move to to preparing them for coating. I want to get the spars ready to rivet together this weekend so that I can rivet them next weekend. If I get lucky, I may even be able to have the whole frame ready to rivet next weekend. That would leave me to rivet the skins on the following weekend.

As I learned with the rudder, it is best to lay things flat as they are coated and after about an hour, when they shouldn't run anymore, they can be hung up to cure for at least three days before assembly.

To dress the edges of longer pieces it is useful to clamp it to the table. In order to do that without marring the metal with the clamps, and also to move the clamps a little bit away from the ends, I use nylon (I think) blocks to hold them.

The front spar took longer because the drilled holes took more deburring than the punched holes. A couple of passes with a file and these are smooth. Once all set, they are cleaned with a 1:1 mixture of DX 330 Spirit Wipe and Lacquer Thinner. It works well and it also takes off the ink that was used on the metal to identify what it is and where it came from.

The front spar gets coated on both sides, the rear spar only on the forward face. The aft face will get covered when it is painted. With the spars all but ready for assembly, it is time to move on to the ribs.

These ribs only have half a flange. That is an issue because the forming process tends to leave them curved and they have to be fluted, usually about halfway between the rivet holes, until they lay flat. With only half a flange, there is very little for the fluting pliers to grab on to. The jaws on the pliers are not square, they are offset. There is a very good reason for this. I have no idea what it is, but there is a very good reason.

It's a little more visible from this angle.

If it were possible to make the flute in the other direction, it would work better because the pliers would have more meat to grab on to. That won't work though, because if I did that, the flutes would create bulges in the skin when I riveted it on. That would not be good.
With the ribs all prepped all that is left is to coat them and let them dry. Fortunately, I was able to get all of the ribs prepped and coated this weekend, so I can rivet the frame together next weekend.

The bottom most rib is only getting coated on the top side, the bottom side, visible from the outside, will be covered when it is painted. The rest of the ribs will get coated on both sides.
It is probably only necessary to coat the areas that will be in contact with other surfaces, the stuff just hanging out in the breeze probably doesn't need to be coated. I am coating it all in this instance to see what is required and how long it takes. This piece is small enough that doing the whole surface takes very little more time than just doing the mating surfaces. When I get to bigger structures, like the fuselage and wings, I will probably back off to just doing surfaces that overlap, otherwise I would spend most of my life doing this. We'll see. I do like the way it looks.

With the second side coated and drying, it is time to call it a weekend and head home. I put a heat lamp on the items and that does help them to dry a little faster. I can't leave the light on all week, but there should be plenty of time for them to dry.
Next time, back to the fun part, more riveting!


Comments