
RV-8 and the 2024 Condition Inspection Part 7
- Steve
- Apr 13, 2024
- 6 min read
Updated: Aug 4, 2025
Progress is being made. Saturday 4/13/24 was a much clearer day than expected. It was tempting to try to throw the airplane back together and go fly, but I had it much too far apart to be able to readily do that. Also, if I don't just settle down and get it finished, well, it will never get finished.

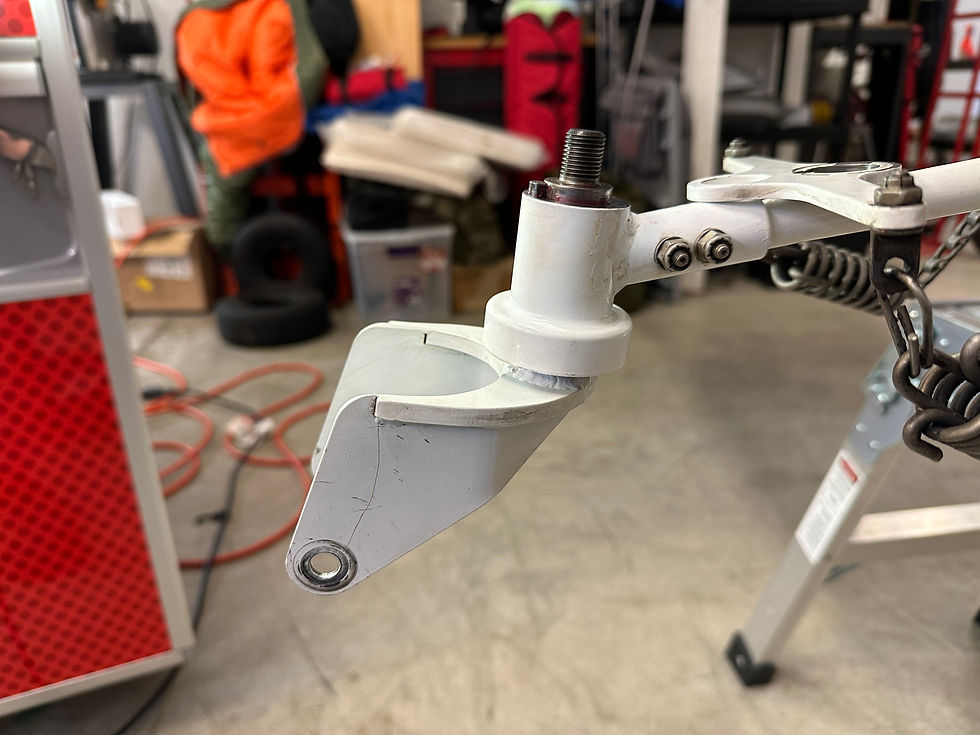
I started by disassembling, cleaning, greasing and reassembling the tail wheel. Fortunately, the Van's tail wheel design is pretty simple and there aren't a lot of moving parts. After removing the nut that holds the whole thing together, it comes apart very easily.
The first thing I had to do was change how I had the tail jacked up. Under normal circumstances, the Tail Mate slides under the tail wheel and I lift and then rest it on a bench. A couple of 2 X 4s under the tail wheel get the tail to a good working height.

While that is a good way to support it, it would be very difficult to get the tail wheel off that way. In order to do that, I have to support the tail somewhere further forward. I use the double bulkhead where the front of the tail "stinger" attaches.

Somehow I found these two Yoga Blocks on Amazon and they work very well for this. They are made of a very dense closed cell foam that are very light and don't compress hardly at all. The two of them together put the tail wheel assembly at a very good working height.
The first thing I cleaned was the yoke and the stinger on the airplane. From there, I moved to the work bench to clean the fork and the locking pin.

Now that everything is clean, it's time to get it greasy again, but this time with clean grease. I put the locking pin and spring back in the fork and then greased the bearings in the yoke.

I have the JD Air Dual Bearing Tailwheel Yoke. It has a needle bearing at the top (above), and a sealed ball bearing on the bottom (below), with a bushing in between. The standard yoke just has a bronze bushing the whole length of the inside of the yoke.

There are no grease fittings, nor any channels for grease to be injected into, so the only way to grease it is to disassemble it and grease it manually, which should be done every 100 hours or so.
Once it is well slathered with grease, it is time to put the fork back in.


There is a Belleville washer under the nut that helps with getting proper tension on the steering mechanism. Too loose and it just flops around, too tight and it won't break out into free castor mode properly. I find that just tight enough to keep the steering arm from having any play is just about right.
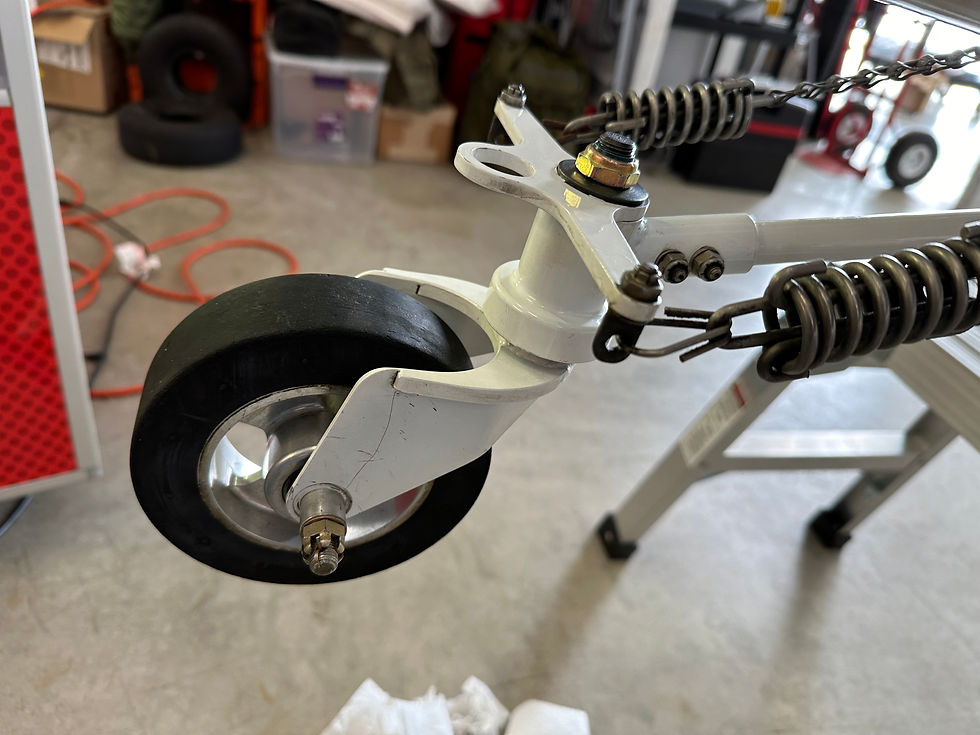
I put the wheel / tire on last. That is the trickiest part as there are a number of different wheel / tire combinations to choose from, but they all need a number of washers to center the wheel in the fork. Most of them are pretty easy to get in in, except the last one, that's always a bit dodgy.
That was the last task on the tail, so I took this opportunity to put all of the panels back on that I had removed.
From here, I worked my way forward. Next stop, the baggage area. I inspected the whole area and lubricated the bellcrank right behind the battery. Again, I like the syringe for getting the LPS 2 exactly where I want it.
I wanted to continue to close as I go, so I put the baggage panels back in. It's not hard, at least if you count screw holes, but that big panel on the bottom is a bit of a bear to wrestle into position.
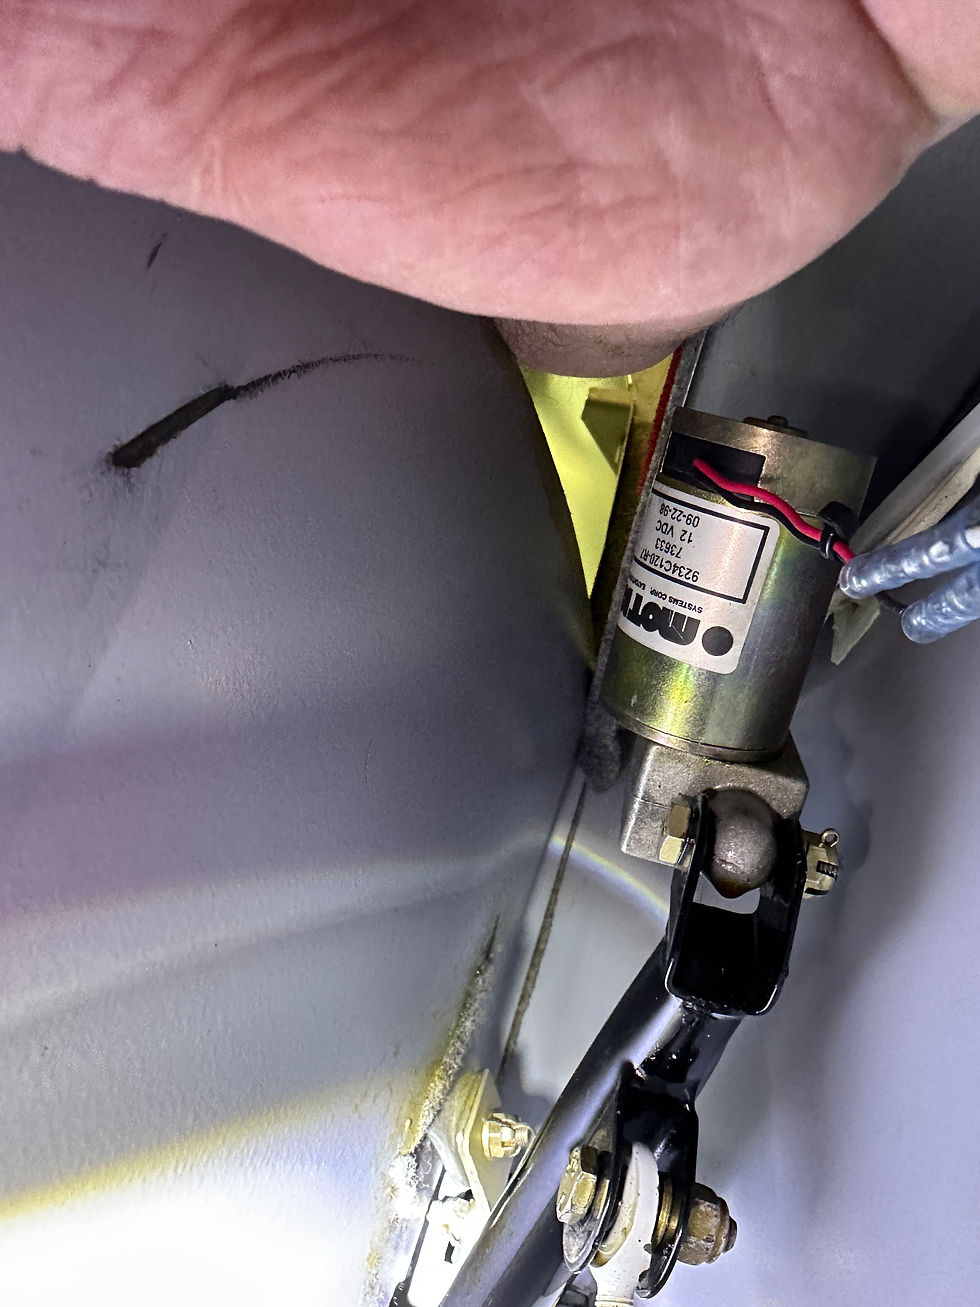
In the main cabin, I began by inspecting / lubricating the flap drive motor and flap push rods. They are located behind panels next to the rear seat.
The panels over the flap pushrods are a bit of a pain, only because of their shape and the fact that the rear seat belt anchors go through them, so they don't really come all the way off, so they have to be held out of the way with one hand while looking and lubricating with the other.
Moving forward, I inspected the area under the front seat. There is one big panel that fits right behind the wing spar. It is a bit tricky to get in and out, particularly in. After looking the area over closely, and trying to vacuum up some of the dirt, I put that panel back in. I had a bit more trouble than usual getting it in, but I finally got all bazillion screws back in.
I moved forward of the spar to get the rudder pedal area and started by vacuuming there. As I was vacuuming under the side floor, by the fuel selector, forward of the spar carry through, I noticed the vacuum pick up something large and relatively heavy. It concerned me a little as I couldn't think of what it could have been. I was a bit worried I would have to take the vacuum apart to dig it out, but fortunately, it was heavy enough to still be in the hose and it was easy to retrieve. It turned out to be a socket that I hadn't realized I left in there last year. It was pretty much in a place it wouldn't have hurt anything, but it still bugged me that I missed it.
As I was lubricating the rudder pedal assembly, I noticed that the pedals would not move. Without using excessive force I could only move them a little bit. Ruh Roh Reorge. I got out to look at the rudder itself and noticed the same thing, the cables, and hence the rudder, would not move.
This had me concerned as I couldn't for the life of me think of anything I had done that would have affected the rudder cables. They run under the floor boards and don't really interact with anything I had touched. Or so I thought.
It was painfully obvious that I was going to have to take things back apart, but I wasn't sure what. It had to be either the big panel under the seat or the rear baggage panel, neither of which I was excited to have to remove and replace yet again. Since I really, really couldn't think of anything in the baggage area that would do it and only really couldn't think of anything under the big panel, I opted to start with the big panel. Fortunately, as soon as I got it out the problem was obvious.
While I was working in the baggage area, my feet just naturally dropped down into the holes under that panel. It didn't seem like that would be a problem, and I did do a final look, mostly for FOD or forgotten tools, just before putting the panel on, but, there it was.

The rudder cables run through the area right under that panel, next to the foot wells, through a piece of plastic tubing that keeps them from rubbing on anything and cutting through it. While I had my feet hanging in those openings, they had pushed that guide tube out of position and caused the cables to bind. The cable is supposed to go through the forward snap bushing but it had been pulled aft and was jammed against the wing carry through structure. It was a simple matter to get those back in position and the rudder pedals, and thus the rudder, once again worked as advertised.
It's truly amazing the simple little things that can work to cause a headache where one should not occur.
From there, it was easy enough to finish inspecting and lubricating everything else and get the rest of the interior reinstalled. From here, all that is left is the wings, so I should be able to finish up in one more day.


Comments